Happy Valentine’s Day

Cutty must have stepped on something, because two days ago we noticed swelling on his right paw. I took him to the vet yesterday and they told me it was an infection. He had to be sedated so they could clean it out and properly dress it. He hates the bandange, but he was nice enough to pose for a photo.

He’s been a real trooper, although with his injury he thinks he must be held AT ALL TIMES!!!!! But this just made for some wonderful cuddle time with him, as both hubby and myself have been battling a nasty virus this week. I am starting to feel better, but hubby went to bed at 7:30 tonight. In any case, Cutty wanted to stop by to tell you all to take time to smell the flowers and remember those you love this Valentine.
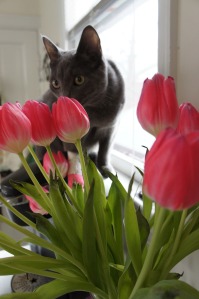
Of course this picture was after we had cleaned up the mess he made when he knocked the whole vase of flowers over and spilled water everywhere. . . oh well! Happy Valentine’s Day!!!

Last of the Christmas Cookies. . .or so I thought

Not a lot of words this time, pretty self-explanatory.

Ornaments.

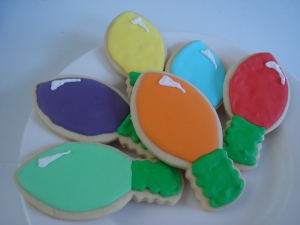
Christmas lights (kind of love these).

Wreaths. This was another cookie I didn’t think I would like but then ended up being pleasantly surprised with them. Recently I had been struggling with making my icing too runny and for this batch I ended up with icing that was too stiff. You can’t tell in the picture, but it was really frustrating to decorate with.

Not the most cohesive group of cookies, but they are festive and edible and that’s what counts!

So this was my last group from the 8 dozen cookies I had made earlier. However, as we speak there are cookies in the oven. I made some more candy pieces because those seem to be really popular (they are smaller so I think people reach for them first) and some small circles. I had icing left over and just couldn’t let it go to waste.

Hubby said I have a cookie addiction. I told him I’ll take that as a compliment.

Copycat Cookies

In my last post I shared some cookies by Sugarbelle. I fell in love with them the minute I saw the original post. I thought I would change it up with a nice mint green instead of the pink she used for accents. A few days ago I showed how I used a cookie cutter to make an imprint in the dough for easier icing later. It worked out just like I hoped.

I filled them and then added dots, since I didn’t have any of the nice sprinkles or drages she used.

I wasn’t too sure about them. Some of them looked OK, but some just looked odd. I didn’t know if I had picked the wrong color or if I just wasn’t as talented as Sugarbelle (that is a silly statement because I am obviously nowhere near as talented as her). To check out the color theory I started working on the coordinating cookies.

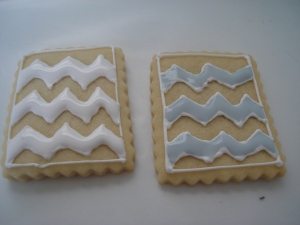
Here are some of the chevrons (I am going to be honest, I loved what she did and I totally just tried to make the set myself. Someday I will be experienced and confident enough to come up with my own creative ideas. Until then all credit for these cookies goes to Sugarbelle)

I was really good and really waited hours between layers. Usually I am too excited/impatient to wait and end up paying the price with bleeding colors, etc.

Hubby thought the reason I didn’t feel great about some of the cookies was the fact that on a few of them there was too much negative space (i.e., not enough of the tree and too much white).

Here is the completed set:

I will honest and say I wasn’t thrilled. The colors work better when you see all the cookies together, but it is nowhere near as cute as the original pink cookies. Some of it I am sure was poor technique. But either way I didn’t feel like taking many more pictures. Oh well, I guess this means I’ll just have to keep practicing 🙂

The important thing is they taste fine and will be eaten tomorrow when my mom’s family gets together for Christmas.

Snowflakes

Totally unrelated to this post. At this time one year ago I was at our wedding reception. Happy Anniversary Honey! I think I will have to do a post later about the crafting I did for our wedding. The header for this blog is a picture of my wedding bouquet. All of our flowers were made of origami. Except for the corsages for the mothers/other wedding part members who had crocheted flowers. I think it made for a very personal touch and it saved A LOT of money. So maybe if I can help some other bride save money it would be worth it. Sorry for all of the unrelated info, just something I was thinking about.

On to the real deal.

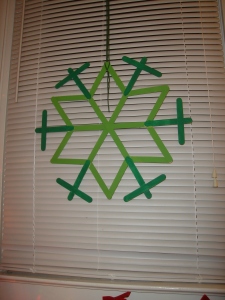
One of the first finds I made on Pinterest were these snowflakes made out of popsicle sticks. I didn’t get any pictures of the process because I was having to use crazy glue. I could not find my hot glue gun and I can guarantee you it would have made this project twice as fast. However, despite the difficulty with adhesives I really love the finished project.

All photography guides tell you to use natural light. So I tried to photograph them in the daylight. Here is the picture I got.

It is actually not terrible because the good news is that in the day the snowflakes make a beautiful silhouette in the window. Although the lighting isn’t ideal, here are the snowflakes tonight.

I switched it up from the tutorial since our couch is red and  our tree is red and gold. Too much red. I like the two different shades of green.

Here they are with our tree and stockings (since we don’t have a mantle) I know the lighting isn’t idea, but it gives you a pretty good idea.

I love having our decorations up! I really wasn’t feeling Christmas until our apartment started to look so festive! Thanks MGC for all your help. Now all I have to do is keep the kittens out of the tree. That is a story for  another day. . . .

Christmas Wreath

I have been trying really hard to postpone Christmas. I have a fear that if I start celebrating it too soon I will be underwhelmed when it finally gets here. So the fact that I have been working on a Christmas Wreath has felt like cheating. However, in my defense I got the idea for it last year when I made a different wreath. (pattern can be found http://thecrochetcrowd.com/) I enjoyed that wreath, I left it up all year and changed the decorations on it, hearts for Valentines, flowers this summer. But, this idea kept nagging at my head. I had a vision and I kept googling it to see if anyone else had done it. I could never quite find what I was looking for. So I started from scratch.

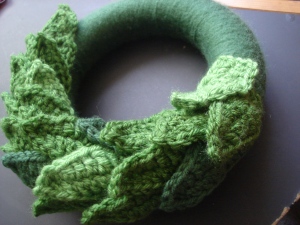
This was a great stash buster. I used various left over green yarns and made up a leaf pattern. I know I had used different patterns in the past and so I just kind of played around until I figured out the general shape and size I wanted.

I made a lot of these. I really should count them.

I had wrapped a foam wreath in the darkest color green (sorry no pictures) and pinned it with sequin pins. I don’t know what you really do with sequin pins but they were the right size for this project. I had the idea to use pins because I wasn’t sure how it was going to work and I was afraid to ruin the project with hot glue. However, I think if I were to make it again I would end up gluing the leaves on. They seem a bit precarious right now. Hopefully they will stay as long as I am not too rough with it. I tried to overlap the leaves in a random pattern.

The final leaves were a bit tricky to place, I think I might add something at that area to cover up where they join.

I think I am most surprised that it actually turned out pretty much how I had pictured it in my head. I am still debating if it needs something else, maybe some berries or a bow. Right now I am just going to enjoy it as our first Christmas decoration this year.

Halloween Cookies

(dedicated to leah w. because she loves cookies)

Before I start. . .I got the idea for these cookies from www.lilaloa.blogspot.com. She is an awesome cookie decorator and I would not have come up with these if it weren’t for her. I just want to be clear that I am not claiming this idea as my own. (check out her site, she has so many great ideas)

I have been wanting to try these for a while and was super excited to have a day off with nothing planned- except cookies! I had never made chocolate cookies before and looking back I should have added some black food coloring to make the final product a little spiffier.

Right now I have to use two of the Martha Stewart silpats on my counter. I cannot wait to get a larger one (hint hint)

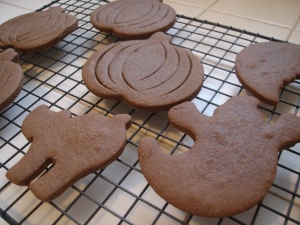
Lilaloa’s chocolate cookie recipe really does not spread when it bakes so these pre-cut lines in the dough are still there when the cookie comes out of the oven!

See! The lines are still there!!

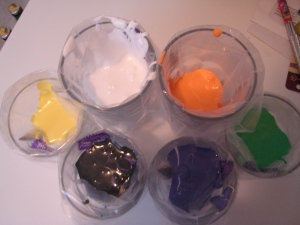
Sorry the lighting is so bad. The one that looks blue is really purple. This is a great tip and I cannot remember where I saw it initially, but I use the glasses to prop open the icing bags so that they are easy to fill. It makes it so easy and mess free!

The light was fading fast, and since it wasn’t great to begin with, I snapped some quick pictures.

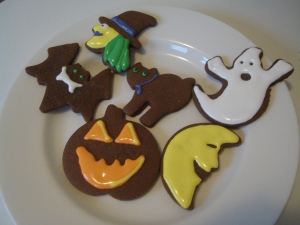
Brandon called these ‘reverse jack ‘o lanterns’.

I almost didn’t make any of the witch cookies, but they turned out to be one of my favorites. I was also surprised by the vampire bat. The moon on the other hand was less than great.

Cutty hung out with me while I was making these, but he was much more excited when I opened the package of fresh beef for dinner (short ribs and mashed potatoes, delicious!)

Inspiration

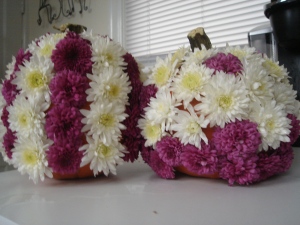
My friend Ashley is an inspiration. She inspires me in a lot of ways. Most recently in a crafty way 🙂 She made a mumpkin (a pumpkin covered in mum blossoms) for her sister-in-law and I just  couldn’t help myself. I had to make a version of my own.I used two different colors of mums for mine. I tried to mix it up a little with patterns. To make the stripes appear straight( on the one on the left) they actually curved toward the front so the back of that mumpkin looks kind of wonky. The other one had a great pattern going and then I ran out of white blossoms so I had to fill in the bottom with purple. In the end they actually are fabulous and add color and fresh flowers in my kitchen and living room. I love having fresh flowers in our home. This was a lot of fun as a fall project- and an alternative to carving a pumpkin.

There is a link http://www.lowescreativeideas.com/idea-library/projects/Mumpkins_0811.aspx that gives a good tutorial on how to make these. However, I did not have an awl (neither did Ashley for hers, she used something her mom had) so I used a hercules hook (http://www.amazon.com/Hercules-Hook-Wall-Hooks-10-pk/dp/B001420MVU ). I used to use hercules hooks in my old apartment to hang pictures and mirrors. However in the apartment we are living in now the walls are over 100 years old and made of plaster so the hercules hook doesn’t work so well. . .unless you are making a mumpkin 🙂 I guess my point is, use anything with a sharp point to poke the holes and it is great to look around and find something you already have.

On another note, the glittery dot pumpkins I made by placing dots of elmers glue on the mini pumpkins and coating them in glitter. I got the idea from somewhere and now I cannot for the life of me remember where. If I find it soon I will let you know.