Smashing Strawberry Muffins

Disclaimer: These are not super sweet muffins. I have been eating healthier muffins for the last two years so I forget that sometimes. I just wanted to warn you. However, if you are looking for something high in fiber, low in calories and super easy for breakfast this could be the right thing. (They still have a sweetness to them and if you wanted to add more sugar you could. Or better yet, add some Splenda or Truvia for some calorie-free sweetness)

I have been making whole wheat muffins for years using recipes from Eating Well. I love them because I make a batch and then freeze them. Each morning it takes only 30-45 seconds in the microwave and I have a hot breakfast! They are each only about 200 calories and full of fiber so I stay pretty full.

This morning I didn’t really have the ingredients for any of my recipes. So I experimented with what I had. The two main ingredients I wanted to work with were frozen strawberries (no sugar added) and unprocessed wheat bran.

I didn’t want to wait for the strawberries to thaw, and since I planned on mashing some with a fork, I thought it would be OK to defrost them in the microwave. Again, it was an experiment so I just thought I would go with it. In the meantime I mixed the other ingredients from what I remembered of other recipes. The proportions always seem to be slightly different with each recipe, so I figure the most important thing was to get the ingredients right and worry about the amounts I used later. If you want to play around with proportions it will not hurt my feelings in the slightest. I mixed the wet ingredients in one bowl; two eggs, 3/4 cups sugar and 1/4 c canola oil. In a larger bowl I mixed 1 cup whole wheat flour, 3/4 cup all purpose flour, 1 and 1/2 tsp baking powder, and 1/2 tsp baking soda, plus 1/2 cup of the wheat bran. Here is where I use a little trick.

Powdered buttermilk. You can find it in the baking aisle. I really only use buttermilk for muffins so it doesn’t make sense to buy it fresh. Plus, once opened and refrigerated it has a very long shelf life. All you have to do when you are ready to use it is add water. I have learned from experience that the best time to add the powder is at this point into the process. Add the powder itself to the dry ingredients and the amount of water required to the wet ingredients (the back of the container will tell you what to add to get the correct volume). I found that if I tried to mix the powder and water up on its own and then add it to the other ingredients, the buttermilk just looks like lumpy water. Much better to add the separate parts to their respective bowls.

Now, what to do with the strawberries. I used a strainer to separate the strawberry pieces from the liquid, and there was a lot of liquid. I hated to waste all of that fluid and I thought it might add a little extra flavor to the muffins. I took 1/4 cup of the left over strawberry liquid and then 1/4 of the strawberry pieces (which were already very mushy) and smashed them up with a fork (This is where I came up with the name smashing strawberry muffins. I think up silly things like this in my head when I am alone. Sorry.)

When there didn’t seem to be any big pieces of strawberry left I added it to my bowl of wet ingredients and wisked them all together. I then poured the wet ingredients into the dry ingredients. Using a wooden spoon I gently combined everything. It is important when making muffins not to over mix the batter. When all of the ingredients were combined I added the rest of the strawberry pieces. I had tried to squeeze a little extra fluid from the remaining strawberries since the batter is pretty moist. Gently mix those pieces in. Then scoop into a muffin tin sprayed with cooking spray ( I used a 1/3 cup measuring cup). Once each tin was full I used what was left over to even them out. The cups were quite full.

I baked them for 12 minutes first, then added 5 minutes and then 3 minutes. So after 20 minutes the tops of the muffins bounced back when touched and I took them out to let them cool.  After a few minutes I took a muffin out to try. Sorry, I ate half of it before I remembered to take a picture.

You can tell they have a lot of whole wheat in them, but they have a nice gentle strawberry flavor and every once in a while you get a bite with a piece of strawberry in it.  Plus, they are pretty large so I think it will make me feel like I am eating more. I calculated that they have about 190 calories a piece, so right on track with the other muffins.  To freeze them you have to individually wrap each muffin, either in plastic wrap or ziploc sandwich bags. In the morning take them out of the plastic and wrap in a paper towel. About 45 seconds in the microwave will do the trick.

Here is an easier to read copy of the recipe:

  • 3/4 c granulated sugar
  • 2 eggs
  • 1/4 c canola oil
  • 1 c buttermilk (or 4tbsp buttermilk powder + 1 c water)
  • 1 c whole wheat flour
  • 3/4 c all purpose flour
  • 1 1/2 tsp baking powder
  • 1/2 tsp baking soda
  • 1/2 c wheat bran
  • 15 oz frozen strawberries

Preheat oven to 350 degrees. Defrost strawberries in microwave. Prepare muffin tins with cooking spray. In a bowl whisk sugar, eggs, canola oil and buttermilk (or water). In a separate bowl whisk whole wheat flour, all purpose flour, baking powder and baking soda, and wheat bran. Strain strawberries and reserve 1/4 c of fluid. Mash 1/4 cup of strawberries with a fork and mix with reserved fluid. Add mixture to wet ingredients. Add all of wet ingredients to dry and combine gently with a spoon. When combined, add remaining strawberry pieces (pat strawberries first with paper towel to remove excess fluid) and stir to combine. Scoop into muffin tins and bake for 20 minutes or until tops of muffins spring back when gently touched. Let cool a few minutes before removing from tins.

I think there is still room to play with this recipe. I might use 1 egg instead of two, or add more whole wheat flour. I might use brown sugar instead of granulated. If you try anything different please let me know what works!

And finally, here is a gratuitous picture of Cutty. He sat in the kitchen the whole time I was baking and meowed at me, as if to say please stop playing with the camera and food and come play with me!

Happy Birthday Hubby!

First of all, if you are like most Americans not married to my husband you have never heard of the computer game Minecraft. If that is the case you may want to click here. The first picture is a pretty good example of what the game looks like. It will help explain what is coming next.

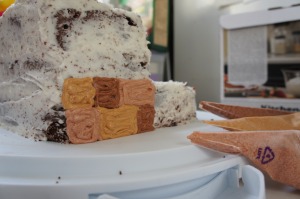
Over the years I have made a few different cakes for Hubby’s birthday, this year he wanted a cake based off the minecraft computer game. I had to do a lot of thinking to even come up with an idea that might work. Since this game is set in an environment with mountains, I knew I needed to start with the shape of the cake. I wanted it to have lots of layers. Then I added a crumb coat of icing.

The graphics are very pixellated, but ohmyhgoodness that would be a lot of work. So I decided to use three different colors of brown to make different colors of blocks. I hoped this would create a similar effect.

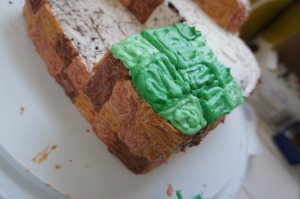
Then I added greens for the grass.

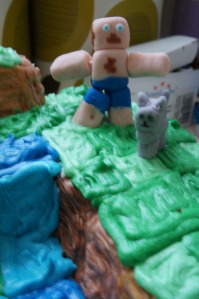
I wanted to add a little extra color with some water.  (Hubby has since corrected me and told me that I was inaccurate in my use of water. It is too detailed and not interesting enough for me to explain here. I thought it looked fine)

Hubby has a very distinct character in this game. (He is based on a character named Tobias from the TV show Arrested Development) There are no cats in Minecraft, but Hubby said it was OK because he wanted Cutty to be on the cake with him. Here’s what I used the fondant for!

Sorry that is a very blurry picture!

Here is the final cake. I added a tree on the lower level for some balance.

So it may not be the most accurate Minecraft cake, but it tasted pretty good! Happy Birthday Honey!

Marshmallow Playdough

OK not really. I recently found myself in need of some fondant. I don’t really like the taste of fondant and I didn’t like the idea of buy a bunch of it for the tiny little project I needed it for. I remembered reading about homemade marshmallow fondant on The Decorated Cookie and went back to check out what was involved. She had included several other links so I checked those out as well. I also googled “marshmallow fondant” and read some of the recipes that popped up.

Then I decided to wing it.

Here is what I did, it is in no way a perfect recipe for this stuff. I am sure I did several things wrong. I just used things I wanted to from some sources and didn’t do things I didn’t like from others. I will share what worked and what didn’t for me. I think this stuff is pretty forgiving so just play around with it until you get what you want.

First, I thought I would grease the bowl I was going to be working in. This stuff sounded sticky and lots of recipes recommended it so it sounded like a good idea.

This is a trick I learned from my mother. I take a sandwich bag and put my hand inside. I then use my fingers to scoop up vegetable shortening, aka Crisco (That’s what I am using here. If I am using this technique to prepare a cake pan I use butter). I like it because you have super control of where the shortening is going.

Then I poured in about 2 cups of marshmallows. One recipe said to make sure you use a good brand. I used the store brand. I honestly don’t know if it made a difference.

I sprinkled 2 tbsp water over the marshmallows and then did something none of the recipes mentioned. I used a wooden spoon to mix the marshmallows and water. I just felt like they needed to be coated. I don’t know why. I will say that after I microwaved them, the ones around the edges that didn’t have water on them didn’t seem as puffy and melted. It could be I was just wanting to think that my little technique worked, but I can definitely say it didn’t hurt anything. So if you want to stir your marshmallows and water, have at it.

Microwave time was something that no one seemed to agree on. One recipe said 30-40 seconds, another said 2 minutes. I did 45 seconds at first. When they didn’t seem melted enough I added about another 25 seconds. So my total was 1 minute 10 seconds. I probably could have done longer, but in the end I don’t think it mattered.

They come out of the microwave looking like this.

As soon as you start to stir them they lose their shape and become like marshmallow soup. I had a few chunks in mine, which made me think I could have used more time in the microwave, but I am stubborn and so I just mashed the pieces of marshmallow until they smoothed out a little. I think it is ok to have a few little pieces because soon you will be using your hands to knead the mixture and everything gets really smooth then.

IMPORTANT INFORMATION: I forgot to mention, before you start to stir the melted mallows coat your wooded spoon in vegetable shortening. I did this and stuff still stuck to my spoon. Really slather it on there.

I measured out 1 lb (16 oz) powdered sugar.

I had read different amounts but since I wasn’t following a recipe I couldn’t remember which amount corresponded with the amount of marshmallows I was using. So I started adding it a little at a time. A few recipes told you to add this mixture to a stand mixer (bowl and blade coated in vegetable shortening of course), but I am not about to make more dishes for myself. One bowl worked fine for me.

About this point I wished I had gotten my mixer involved. It was getting very hard to mix with the spoon. Then I thought, since you have to get your hands in it later anyways, why not get started now.

I slicked up my hands with shortening (noticing a theme here?)

And kept adding powdered sugar until the dough wasn’t sticky anymore. I ended up using about 9 ounces. I think my dough was a little too dry, but since I don’t have much experience I wasn’t sure. 8 ounces might have worked better.

OH YEAH! I almost forgot! Quite a few recipes called for greasing up your counter top or cutting board to knead the dough. I did all of the kneading inside the bowl. I am all for having to clean the fewest surfaces possible. It worked perfectly fine and made this a one bowl/one spoon project. Perfect!

I did put down some wax paper to add my coloring. The skin tone and grey weren’t too bad, but while mixing the blue my hands were completely dyed!

The next morning I had to make some green and brown and I began to wonder if there was a way to do it without turning your hands into rainbows. I started with my ball of white fondant. I flattened it into a pancake and dropped food coloring in the middle. I folded the edges in and then wrapped the whole thing in plastic wrap and started kneading. The plastic wrap kept the dye off my hands, but was really difficult to work with. It also seemed at times that it was so thin it would bust and spill food coloring everywhere.

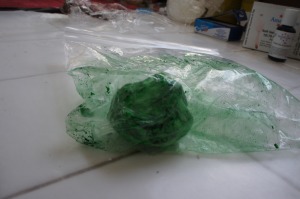
So then I made anther ball of white, flattened it and added color. This time after I folded the edges in I dropped the whole thing into a sandwich bag. Not perfect, but a lot easier to manipulate the dough. Also the extra dye stayed on the sides of the bag not my hands.

When I had mixed most of it in I took it out of the bag to finish evening out the color. What little green came off on my hands washed easily away with a little soap and water.

So I hope that helps. It is not a perfect recipe, but it worked for me. Again, I used:

  • 2 cups mini marshmallows
  • 2 tbsp water
  • 8-9 ounces powdered sugar
  • lots of shortening for coating things
  • food coloring
  • sandwich bags
  • and of course 1 bowl and 1 spoon

What did I use the fondant for? You’ll have to wait and see on Tuesday!

Cookie Lesson

I was asked to give a cookie lesson. Me. I am soooooooo not the expert, but I agreed because we would be doing it at her house and she was baking the cookies. All I had to do was show up and decorate. Armed with the few little pieces of advice I have, I headed over to try and help.

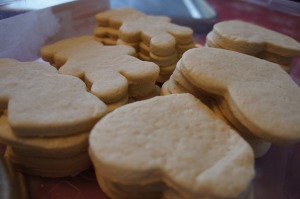
She had made a bunch of fabulous cut-out cookies.

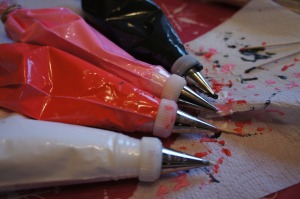
We started with how each time I try to decide on the least number of colors I can use to still have interesting and adequately detailed cookies. Since we were just learning we decided on white, pink, red and black (there were lots of hearts so the first three might have been adequate, but the black would help with the little scottie dog cookies) I am all about saving on clean up later.

I shared my favorite icing recipe from Bake at 350.  I have tried several but this one is so simple I can remember it without having to look at it. It also gives me pretty consistent results.

Here are a few I came up with.

And here are some of hers. (One of the best was the cutest little white scottie dog and that picture turned out totally blurry! Sorry, still getting used to the new camera)

I will be honest, she didn’t need much teaching. She is quite talented. However, I know I didn’t do a great job imparting wisdom because we were old friends who hadn’t seen each other in a long time and we were a little more interested in catching up on things.

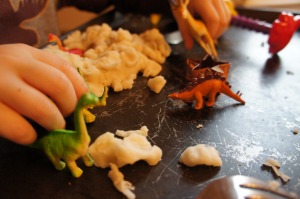
One of the best parts was her sweet three year old who was busying himself with playdough and dinosaurs next to us.

So maybe I’m not the best teacher, but I hope this morning was a good place to start. If nothing else I was able to share some of the fabulous resources that are out there for cookie decorators! (See some of the blogs I follow on the right side of the page)

Confession of a Dog Person (aka I got a new camera and made a discovery)

I got a new camera for Christmas! Actually I got money to go toward the new camera. For a month I had read reviews and asked opinions, gone to the store to hold them and then debated for hours about what camera to buy. (I could write a whole post on that process) Finally I decided on a Sony Alpha NEX-3. Totally different from what I thought I would get, but once I had made up my mind I could not wait to get my hands on it. If only I had know that the day after the camera arrived on my doorstep Amazon would drop the price by 70 dollars. . . Still, I had put so much thought into this purchase I was happy with it even for the amount I paid.

Anyways, for the past few days I have been playing with my camera. Besides the beautiful flowers on my kitchen table. . .

my favorite subject has been-you guessed it – Cutty!  With my old point and shoot I could rarely capture a photo of him that wasn’t a completely blurry mess. Unless of course he was asleep.

That picture was taken with my old camera and you can see the glare from the flash, gross. I mean I have had this new camera for all of three days and I am a total lighting expert now (and chocolate chip cookies have no calories and I am going to win the lottery). More importantly Pioneer Woman has taught me all about apertures and ISO and shutter speeds.  Armed with a hazy idea of what all those words mean, I have played around with the manual settings on my camera and realized I can now do this:

Even when he would try to move away or dash under the bed, I could usually produce a useable picture! He does seem to feel the need to move as soon as a camera is pointed in his direction. Most often he walks right up to the camera and sniffs it. He has no grasp of the concept of posing for a picture.

Here comes the confession.I LOVE THIS CAT. As I was looking through the pictures I discovered I could no longer keep this a secret. You don’t understand, I grew up with dogs! I was going to get a Yorkie when I grew up. I used to tell people I hated cats. Now, I actually like almost every cat I meet (there will always be a few exceptions).

Look at that face! What’s not to love? I just want to pinch his little cheeks. He would probably let me because he is oddly tolerant of some of the weird things I do to him. He is actually oddly like a dog in many ways. He meets us at the door when we come home, he plays fetch and sits on command. He loves nothing better than to sit in our laps.  But I don’t think it is just his dog qualities that make me a newly converted cat person. I know this because every once in a while he does something that is just so. . .well, cat. And I still love him.

As soon as the box hit the floor he had climbed into it. I would still get a dog if I could (Hubby has allergies), but in the meantime the cat and I will be cuddling on the couch if you need us. I’ll just call myself an equal opportunity pet owner.

Look!

Look!

It’s a swatch of stockinette stitch (usually made with knitting needles).

Look again!I used this crochet hook to make it! A while ago I had read about a technique called Knooking at PlanetJune  and had been considering experimenting with it. It uses a cord on the non-hook end of the crochet hook to take the place of the second knitting needle.

With the cord holding the place of the second needle, you use the crochet hook to work the stitches.

I had a rough start, apparently I was twisting my stitches. But once I figured out what I was doing wrong I was amazed at what I was creating. I hadn’t tried knitting in a long time, but my previous attempts had been terrible failures. I am hoping this means I will have more options with future projects.  It does feel pretty strange to me, the movements are different than what I am used to with crochet. I also don’t know if it is easier than knitting or just the same. I have been intrigued with knitting but haven’t wanted to give up the hook yet. This way I don’t feel too much like a traitor.

If anyone is interested the kits are made by Leisure Arts and can also be found at Wal Mart.